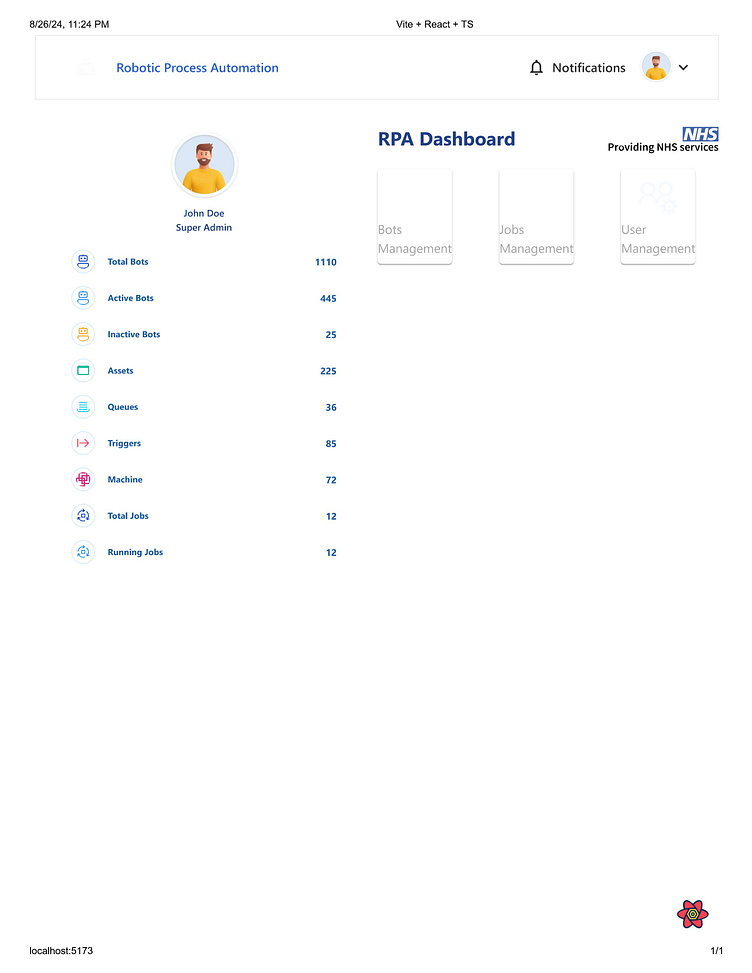
RPA Dashboard after successful Login

Once the user logs in successfully, redirect them to the RPA dashboard. This can be done programmatically using React Router or any other routing mechanism you're using.
Use React Query to fetch any user-specific data needed for the dashboard. This might include fetching tasks, automation logs, or other relevant information that the user can manage or monitor on the dashboard.
Present an overview of the user's ongoing and completed RPA tasks. You might show a table or list that displays task names, statuses, start times, and other pertinent details.
Provide options on the dashboard for users to start new RPA tasks. This could involve forms, buttons, or a wizard-like interface where users specify the parameters for the automation.
If possible, implement real-time updates to reflect the status of ongoing RPA processes. This can be done using websockets or periodically polling the backend with React Query to fetch the latest status.
Ensure the dashboard includes error handling mechanisms. For example, if an RPA task fails, notify the user with an alert or a message. Additionally, use notifications to inform the user when tasks are successfully completed or require attention.
nclude options for the user to manage their account, adjust settings, or configure how the RPA tasks should behave. This might involve options for scheduling tasks, setting priorities, or integrating with other systems.
Ensure the dashboard has a secure logout mechanism and any sensitive data is handled securely. You may also implement session timeout and re-authentication features for enhanced security.